Last Updated: November 20, 2026
Quick Summary
Limestone restoration for historic buildings is the controlled process of stabilizing, cleaning, and repairing aged limestone masonry so the structure keeps its architectural integrity and historic fabric. It follows a fixed sequence: condition assessment, deterioration diagnosis, crack and spall repair, compatible lime mortar selection, gentle cleaning, permitting, and long-term maintenance. Intervene as little as possible, and never with a material stronger or less vapor-permeable than the stone.
- Water is the engine behind nearly every deterioration pattern in limestone masonry.
- Lime mortar is softer and more permeable than limestone, so the joint sacrifices itself and the stone survives.
- Rake out joints to roughly twice the joint width and dampen before packing mortar.
- Fix roof, gutters, and drainage before repairing stone, or the repair is wasted.
- Clear gutters and downpipes twice a year, before and after winter.
Table of Contents
- Why Limestone Restoration Matters for Historic Buildings
- Assessing Condition and Identifying Causes of Stone Deterioration
- Historic Limestone Masonry Repair: Cracks, Spalls, and Damaged Stone
- Historic Masonry Mortar Repair and Material Compatibility
- Limestone Cleaning for Historic Buildings: Choosing the Right Method
- A Sequenced Restoration Workflow From Survey to Handover
- Limestone Restoration Cost: What Drives the Budget and Timeline
- Permits, Preservation Review, and Long-Term Maintenance Planning
- Request a Free Estimate for Your Limestone Restoration Project
- Frequently Asked Questions
Why Limestone Restoration Matters for Historic Buildings
Limestone restoration for historic buildings is the controlled process of stabilizing, cleaning, and repairing aged limestone masonry so the structure keeps its architectural integrity and historic fabric. Limestone is a sacrificial material: it absorbs moisture, sheds surface layers over time, and reacts to almost everything applied to it. Get the sequence wrong and you accelerate the decay the work is meant to stop.
That matters more than most owners expect. Limestone is a sedimentary stone, typically formed from compressed shell and mineral deposits, and it is far more porous than granite. Water moves through it. Salts crystallize inside it. Mortar that is harder than the stone will slowly crush the stone edges around it. Every decision in a restoration project flows from those three facts.
Below, we walk through the general sequence used on historic limestone projects: condition assessment, deterioration diagnosis, crack and spall repair, compatible mortar selection, cleaning method choice, permitting, and long-term maintenance. If you want to see how this applies to churches and landmark facades specifically, our certified cathedral limestone restoration service covers the scope in detail.
Assessing Condition and Identifying Causes of Stone Deterioration
Condition assessment is a systematic survey of the stone, the mortar joints, and the water pathways around them, documented before anyone touches the surface. The goal is not a repair list. It is a diagnosis.
Reading the Warning Signs
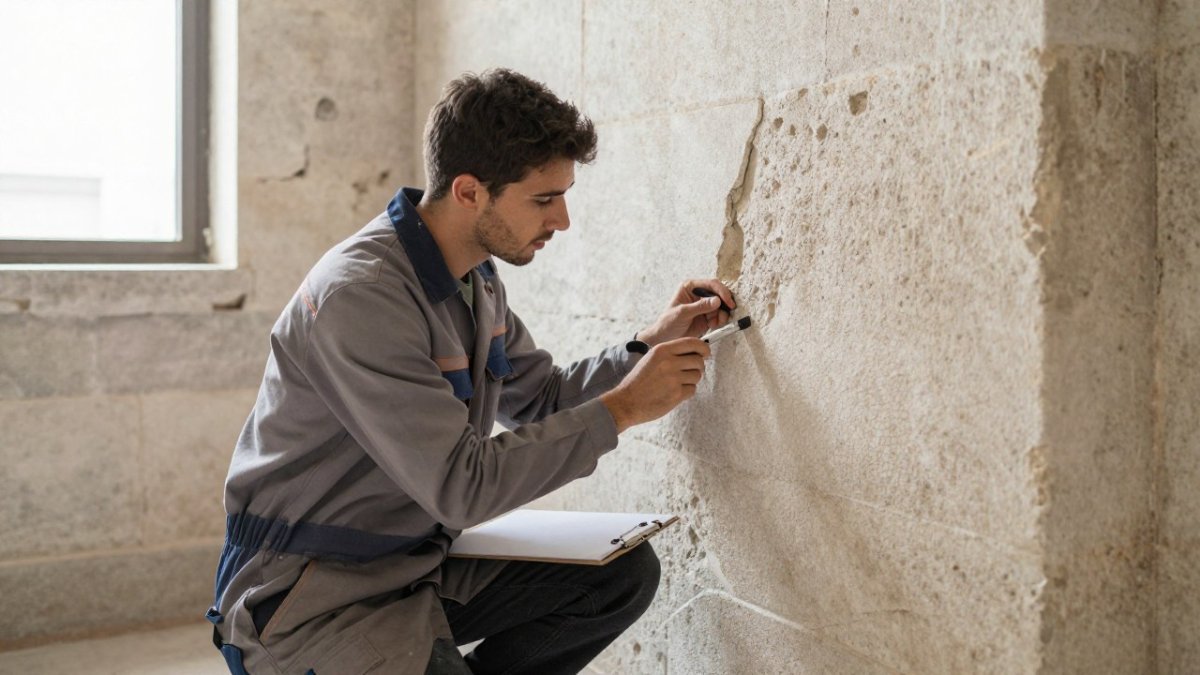
Walk the elevation with a tap hammer, a moisture meter, and a camera. Look for:
- Spalling: flat plates of stone shearing off a face, usually above a saturated zone
- Powdering or sugaring: surface grains releasing under light finger pressure
- Efflorescence: white salt bloom that reappears after rain
- Open or recessed mortar joints: the first entry point for water
- Cracks: map whether they are hairline, stepped, or structural
- Biological growth: algae and moss hold moisture against the stone
A common mistake is treating a spall as a surface blemish and patching it. The spall is a symptom. The cause sits behind it.
Diagnosing Moisture and Water-Related Damage
Water is the engine behind nearly every deterioration pattern in limestone masonry. The diagnostic question is not whether moisture is present, but where it enters and why it cannot leave.
Look at three pathways: roof and gutter failures above the wall, failed mortar joints and coping joints, and rising damp at grade. Then check whether the stone can dry. A repointed joint with a hard, low-vapor mortar can trap moisture inside the limestone and push the damage inward, which is often worse than the original leak.
Historic Limestone Masonry Repair: Cracks, Spalls, and Damaged Stone
Repair of historic limestone masonry generally follows one principle above all others: intervene as little as possible, and never with a material stronger or less vapor-permeable than the stone.
For cracks, the approach depends on movement. Hairline cracks with no active movement are typically left alone or lightly filled with a lime-based grout. Cracks that are widening, stepped, or tied to a structural issue need an engineer’s assessment before any filling, because sealing an active crack hides the evidence and concentrates stress elsewhere.
For spalls, a common method is to remove loose material back to sound stone, clean the pocket, and build it back with a lime-based repair mortar matched in color, texture, and porosity to the surrounding limestone. Where a spall is deep or the stone is a carved architectural element, indenting with a matched replacement stone piece is often the better route.
For eroded or missing sections, replacement stone is matched for color, bedding, and absorption so the patch weathers at the same rate as the original.
Watch out: cement-rich patching mortar is the most common cause of accelerated damage on historic limestone. It is harder than the stone, traps moisture, and forces salt crystallization into the limestone face instead of the joint.
Historic Masonry Mortar Repair and Material Compatibility
Historic masonry mortar repair means repointing joints with a lime-based mortar whose strength, porosity, and vapor transmission sit below those of the limestone it surrounds. Material compatibility is not a preference in preservation work. It is the mechanism that keeps the wall dry.
Why Lime-Based Mortar Protects Historic Fabric
Lime mortar is softer and more permeable than limestone. That sounds like a weakness and is actually the entire point. When water enters the wall, it migrates to the path of least resistance, which is the mortar joint. The joint sacrifices itself, and the stone survives.
Swap in a hard cement mortar and the logic reverses. The joint becomes the strongest element in the assembly, so moisture and salt movement get redirected into the limestone. The result is spalling along joint edges, a pattern that looks like the stone failed but was actually caused by the repair.
Repointing also demands correct joint preparation. Rake out to a sound depth, typically around twice the joint width, square the edges, and dampen the joint before packing mortar in. Never tool a joint flush and smooth it into a hard skin. Match the original profile.
Limestone Cleaning for Historic Buildings: Choosing the Right Method
Limestone cleaning for historic buildings should remove surface deposits without removing the stone’s face, and the gentlest method that works is generally preferred. Cleaning is a high-risk phase of any project, because damage done here is irreversible.
Start with a test patch on an inconspicuous area, let it fully dry, and compare against the uncleaned stone. Then choose:
| Condition | Preferred Method | Avoid |
|---|---|---|
| Light soiling, dust, general grime | Low-pressure water soak and soft natural bristle brush | Abrasive blasting |
| Biological growth, algae, moss | Gentle biocide after trial, then low-pressure rinse | High-pressure washing |
| Heavy carbon or pollution crust | Poultice or specialist micro-abrasive systems under trial | Aggregate blasting |
| Salt contamination | Poultice extraction, repeated | Simple washing, which drives salts deeper |
| Paint or coating residue | Chemical stripper matched to the coating, trial first | Mechanical scraping of carved detail |
Three controls decide whether cleaning helps or harms. Pressure: keep it low, because high pressure opens the pore structure and destroys tooled surfaces. Water volume: soak, do not blast, and control runoff. Chemistry: no acidic cleaners on limestone, ever, and no formula that leaves soluble salts behind.
Cleaning a saturated wall can push water and contaminants deeper into the stone, so letting the masonry dry first is generally advisable.
A Sequenced Restoration Workflow From Survey to Handover
A complete restoration workflow runs in a fixed order, because each phase protects the next. Skip a step and the later work fails.
- Survey and documentation. Photograph every elevation, map defects, record joint conditions, and note previous repairs.
- Diagnosis. Identify the deterioration source, not just the symptom. Moisture mapping, salt testing, and structural review where cracks are active.
- Test patches. Trial the cleaning method and the repair mortar on hidden areas. Approve color and texture match before scaling up.
- Enabling works. Fix the roof, gutters, downpipes, and drainage first. Repairing stone under an active leak wastes the repair.
- Cleaning. Gentlest effective method, working top-down, with runoff controlled.
- Repointing. Rake, dampen, and pack lime mortar in correct profiles, in weather the mortar can cure in.
- Stone repair and replacement. Cracks, spalls, indents, and matched replacement stone.
- Protective treatments. Only where specified and appropriate. Many historic limestone walls perform better untreated.
- Handover and monitoring. Photo record, material schedule, and a dated inspection plan.
The sequence matters because cleaning before diagnosis removes evidence, and repointing before the roof is fixed means repointing twice.
Limestone Restoration Cost: What Drives the Budget and Timeline
Limestone restoration cost is driven by access, extent of stone replacement, cleaning method, and preservation review requirements, not by square footage alone. Two facades of identical size can land in very different budgets because one needs a lift and the other does not. Most owners come to this work expecting a per-square-foot number; the honest answer is that a per-square-foot figure is only meaningful after the survey, because the survey is what tells you how much of the wall is actually stone and how much is failed mortar, coating, or previous cement repair.
The main cost drivers, and how they behave in practice:
- Access: scaffolding, swing stages, and sidewalk protection often carry a large share of the total. A building that can be worked from a lift or a rolling tower costs far less per elevation than one that needs full scaffold with a sidewalk shed. Access is also the driver most sensitive to schedule, because scaffold rental is a monthly cost that keeps running while the work waits on weather or approvals.
- Extent of replacement: carving matched replacement stone for carved detail is a craft cost, not a materials cost. A plain ashlar block is a stone-yard order; a carved capital, sill, or finial is a carving commission with lead time. The ratio of repair to replacement is the single biggest swing factor in most budgets.
- Cleaning method: poultice and micro-abrasive systems cost more than water soak but protect the stone. The trade-off is real: a cheaper method that opens the pore structure or erodes tooled detail creates a future repair that costs more than the cleaning saved.
- Mortar and matching: custom color and aggregate matching for lime mortar takes trial time. Expect test panels and a curing wait before the match is approved, and budget that trial time into the schedule rather than treating it as a free extra.
- Review and permitting: preservation review submissions, any required documentation, and the review calendar itself. On designated properties, the approval timeline can exceed the construction timeline.
- Timeline: lime mortar cures slowly and cannot be forced with heat, so weather sets the schedule. Work that cures in mild, damp conditions cannot be compressed into a dry heat wave without risking the mortar.
A practical way to budget is to separate the project into three buckets rather than one number: enabling and access (scaffold, roof and gutter repairs, protection), stone and mortar work (cleaning, repointing, repair, replacement), and soft costs (survey, testing, review submissions, documentation). Owners who budget only the middle bucket are the ones surprised by the total. A common pattern is that enabling and soft costs together rival the visible stone work on small, highly accessible buildings, and fall to a smaller share on large elevations where scaffold is amortized over more area.
Phasing is the main lever on both cost and duration. A building does not have to be restored in one campaign. A defensible sequence is to fix water sources and repoint the most exposed elevations first, then return for cleaning and stone replacement in a later phase once the wall has dried. Phasing spreads cost across fiscal years, which matters for churches, museums, and preservation societies that raise funds in cycles, and it lets later phases benefit from what the first phase learned about the stone. The trade-off is that scaffold may be erected twice, so phasing saves cash flow but not always total cost.
On duration, the honest framing is that limestone restoration is measured in months, not weeks, and that the calendar is set by three things: the review and approval period, the test-patch and curing period, and the weather window for lime mortar. A project that is approved in spring can usually complete cleaning and repointing before cold weather; one approved in late fall often waits for the next season. Most practitioners find that the construction itself is rarely the long pole, the approvals and the curing waits are.
Watch out: a quote that arrives without a survey is a guess, and the lowest guess is usually the one that assumed the least replacement and the cheapest cleaning method. Compare proposals on scope and method, not on the bottom line alone.
For a clearer picture on your own building, get a free estimate for stone restoration without the guesswork. We would rather walk the elevation and give you a real scope than quote a number over the phone.
Permits, Preservation Review, and Long-Term Maintenance Planning
Permits and preservation review are required for most exterior work on designated historic buildings, and the review board’s standards should shape the scope before the first test patch. Local historic district commissions, state historic preservation offices, and the Secretary of the Interior’s Standards for the Treatment of Historic Properties all push toward the same principle: repair rather than replace, and match materials to the original. The Standards are not a building code and do not themselves permit anything, but review bodies commonly use them as the yardstick for whether a proposed scope is appropriate.
How Preservation Review Actually Runs
The process is usually a sequence, and knowing it prevents the most common scheduling mistake, ordering stone before approval.
- Determine jurisdiction. Confirm whether the property is in a local historic district, individually designated, or subject to state or federal review because of funding, licensing, or easement. Each layer can add a separate approval.
- Pre-application meeting. Ask the reviewer what they will want to see. Most commissions publish application checklists, and a short conversation up front saves a rejected submission later.
- Submit a scope with evidence. Reviewers respond to documentation: photographs of the defect, a condition survey, test-patch results, and a material specification naming the mortar mix and replacement stone source. A scope that says “repair damaged stone” invites questions; one that says which stone, which mortar, and why invites approval.
- Test patches as evidence. Where the commission allows it, a mock-up panel is the strongest argument for a cleaning method or mortar match. It converts an abstract proposal into something the board can see.
- Written decision. Get the approval and any conditions in writing before procurement. Approved-scope changes are slow, and a conditional approval that requires a sample panel can reset the schedule.
Two practical notes. First, keep a material file: mortar mix, aggregate source, stone supplier, and cleaning products. Future stewards of the building will need it, and its absence is why so many second-generation repairs go wrong. Second, coordinate the review with the contractor’s schedule rather than after it, a scope approved in principle but not in writing is not approved.
Watch out: proceeding with “minor” work before review because it seems reversible can be a mistake. Cleaning and repointing are treated as alterations in many districts, and unauthorized work can trigger stop-work orders and remediation requirements.
A Condition-Based Maintenance Calendar
Maintenance is where the budget is actually saved. The point of a calendar is not to inspect everything constantly but to inspect the right things at the right interval, and to record what you see so change is visible over time. A workable schedule:
- Twice a year, before and after winter: clear gutters, downpipes, and any roof drainage that discharges near the wall. Water management is the highest-leverage maintenance task on any limestone building.
- Annually, in the same season each year: walk every elevation with photographs from the same viewpoints. Compare against last year’s set. New spalling, joint opening, or a fresh salt bloom is a signal, not a cosmetic issue.
- Every two years: check coping, parapet, and chimney joints, and inspect any previously repointed areas for shrinkage or loss.
- Every three years: re-test moisture at known problem zones and review the material file against any new repairs.
- After unusually wet seasons or freeze-thaw cycles: a targeted walk of the most exposed elevations, looking specifically for biological growth and new powdering.
Record the results in a simple condition log keyed to elevation and location, with dates and photographs. The log is what turns maintenance from a series of reactions into a trend line, and it is the document a future contractor or reviewer will ask for.
Preventive intervention on a small joint is a fraction of the cost of a stone replacement. For more on ongoing care across stone types, browse our blog.
Request a Free Estimate for Your Limestone Restoration Project
The hardest part of limestone restoration is not the mortar. It is knowing which phase your building is actually in, and resisting the urge to clean and patch before the water source is fixed.
That is the work we do. Johnny Stone Work specializes in marble, slate, and granite restoration for residential and commercial clients, with free estimates. We have 163 happy customers.
Get started with Johnny Stone Work and put a documented, sequenced restoration plan behind your building instead of another patch. Contact us to schedule your free estimate.
Frequently Asked Questions
How much does it cost to restore limestone on a historic building?
Limestone restoration cost depends on the building’s size, how far the stone has decayed, access needs, and whether cleaning, repointing, or replacement is involved. Small repairs on a few square feet sit at the low end; full facade work on a large historic property runs much higher. Because every scope differs, most contractors quote after an on-site survey. Ask for a written breakdown covering cleaning, mortar repair, stone replacement, and protective treatments so you can compare bids fairly.
Can deteriorated limestone be restored, or does it have to be replaced?
Most limestone can be restored. Surface soiling, stained mortar joints, hairline cracks, and shallow spalling are usually addressed with cleaning, repointing, and patching. Stone is replaced only when it has lost structural section, is deeply eroded, or cannot hold a repair. A condition assessment maps each elevation and marks areas as repair, consolidate, or replace, so replacement stays limited to stone that genuinely needs it.
What type of mortar is used for historic masonry mortar repair?
Historic limestone masonry was typically laid with lime-based mortar, which is softer and more vapor-permeable than modern Portland cement mixes. Repointing with a mortar stronger than the stone forces moisture to escape through the limestone itself, causing spalling and erosion. A compatible lime mortar matched to the original in strength, color, and texture lets the wall breathe and move as it was designed to. Always test a small patch before full repointing.
How do professionals clean limestone on historic buildings?
Professionals start with a test patch on an inconspicuous area to confirm the method will not damage the stone. Low-pressure water-soak cleaning, gentle poultices for stains, and soft-bristle brushing are common. Abrasive blasting and high-pressure washing are avoided because they open the stone’s surface and speed up decay. Cleaning pressure, dwell time, and water absorption are all controlled, and the wall is rinsed and allowed to dry slowly.
How often should historic limestone masonry be inspected?
A visual inspection once a year, ideally after winter, catches most problems early. A closer survey by a stone specialist every three to five years is sensible for older facades, and immediately after any storm, freeze-thaw cycle, or water leak. Watch for crumbling mortar joints, new cracks, chalky surface loss, and dark damp patches. Early intervention on small defects is far cheaper than rebuilding failed sections later.
Do I need permits or preservation review before restoring a historic building?
Often yes. Buildings in locally designated historic districts or listed on the National Register may require review by a preservation commission before exterior work, and local building departments may require permits for facade repairs or scaffolding. Rules vary by municipality, so confirm requirements before work begins. A contractor experienced with historic properties can prepare documentation and photographs to support the application and keep the project on schedule.