Last Updated: November 7, 2026
Quick Summary
You can learn how to restore dull kitchen cabinets without sanding by cleaning the surface, spot testing, then applying a restorative finish and a thin coat of feed wax. This works on wood cabinets with an intact finish, not on bare wood or peeling coatings.
- Dull kitchen cabinets usually need cleaning, not replacing, so identify the material and finish first.
- Never spot test on a visible door face; use the inside of a door or a hidden panel.
- Work from the top down, rinse with clean hot water, and dry completely before applying anything else.
- Apply restorative finish in thin, even coats with the grain; two thin coats of wax are plenty.
- If a spot still looks wrong after two attempts, the finish is likely too far gone for a no-sand approach.
Table of Contents
- Assessing Your Cabinets Before You Restore Dull Cabinets
- How to Clean and Restore Wood Cabinets: Degreasing and Surface Preparation
- How to Restore Dull Kitchen Cabinets Without Sanding
- Choosing the Best Product to Restore Kitchen Cabinets
- How to Fix Worn Spots on Kitchen Cabinets and Troubleshoot Uneven Results
- Book a Cabinet Restoration Estimate With Johnny Stone Work
- Frequently Asked Questions
Assessing Your Cabinets Before You Restore Dull Cabinets
Dull kitchen cabinets usually need cleaning, not replacing. Before buying anything, identify what your cabinets are made of and how they were finished, that decides whether you can restore them without sanding or need a full refinish.
Homeowners often tear out solid wood cabinets that only needed a proper clean and a fresh coat of wax.
Identify the Material and Existing Finish
Cabinet finish is the protective layer on the surface, and it determines what products you can safely use. Factory clear-coated wood behaves differently from painted doors or vintage varnish, and a cleaner safe on solid oak can lift laminate edge banding or soften veneer adhesive.
Work through these checks in order, and stop as soon as you have a confident answer:
- Look at the wood grain. Grain continuing across the face frame and door usually means solid wood or veneer; an identical repeating pattern means printed laminate or vinyl wrap.
- Check the edges and seams. A thin line of different color along a door edge, or a seam where the face meets the side, points to veneer or laminate over particle board or MDF.
- Tap the surface lightly. A hollow sound can mean a veneer or laminate skin over a composite core; a dense sound suggests solid wood.
Watch out: never test on a visible cabinet door face. Use the inside of a door, the top edge of a drawer box, or a hidden side panel, because denatured alcohol and some cleaners can permanently dull or dissolve a finish.
Match the Material to the Right Approach
Once you know the material, the safe options narrow quickly. Use this as a compatibility check before you buy anything:
- Solid wood with an intact clear coat: cleaning, a restorative finish, and wax are all safe.
- Wood veneer: treat like solid wood for cleaning, but keep moisture low and avoid soaking, which can lift veneer at seams and edges.
- Laminate or vinyl wrap: skip wax and oil-based restorers; use a laminate cleaner and a polish for synthetic surfaces, since solvents and abrasives can cloud or scratch the print layer.
Decide Between Cleaning, Polishing, and Refinishing
Most dull cabinets need cleaning and refreshing, not refinishing. Use this symptom-based decision tree before you spend money:
| What You See | What It Means | What to Do |
|---|---|---|
| Grease film, fingerprints, light grime | Surface dirt only | Clean and degrease |
| Dull sheen, no visible damage, finish feels hard | Worn or oxidized protective coating | Clean, then apply restorative finish and wax |
| Small scratches, worn edges, color loss at corners | Light wear on the finish | Clean, spot restore, wax |
| White haze or cloudy patches | Trapped moisture in the film | Dry fully, then test a light reapplication |
| Peeling, blistering, bare wood, deep scratches | Finish is failing | Refinish or hire a pro |
If the finish is peeling or the wood is exposed, stop. No wax or polish will fix that, and adding product on top of a failing coating usually makes peeling worse.
The least invasive option that passes a spot test is the right one: cleaning first, polishing or a restorative finish second, and refinishing last, it is the only step that removes the original finish and cannot be undone.
How to Clean and Restore Wood Cabinets: Degreasing and Surface Preparation
Grease and grime block any restoration product from bonding. Skip this step and your new finish will look streaky within days. The goal is to remove everything that is not the finish without softening or dulling the finish itself.
Choose the Gentlest Cleaner That Works
Start with the mildest option and step up only if it fails. This ladder keeps you from damaging a finish you are trying to save:
- Light dust and fingerprints: a damp cloth with a few drops of dish soap in hot water.
- Normal kitchen grease: a diluted oil soap or pH-neutral cabinet cleaner.
- Heavy, sticky grease near the range and under upper cabinets: a dedicated degreaser applied to a cloth, not sprayed directly on the cabinet.
Watch out: avoid abrasive powders, scouring pads, and ammonia-heavy glass cleaners on wood finishes. They dull the sheen and can leave a haze that looks like the original problem.
Spot Test Every Cleaner Before You Use It
A spot test is a small application of your chosen product on a hidden area to check color and compatibility. Do it every time, even with a product you have used before, because finishes vary from cabinet to cabinet.
Test on the inside of a cabinet door or a hidden side panel. Apply a small amount, wait the full time the label states, then check for:
- Uneven color or a lightened patch
- Sticky residue
- A finish that looks cloudy or milky
If any of those appear, stop and try a different product. A cleaner that passes on one door can fail on another if cabinets were refinished in stages.
Work in This Order
- Remove hardware, handles, and knobs, grease collects around screw holes and behind pulls.
- Work from the top down so drips do not run over cleaned areas.
- Wipe doors and frames with a damp cloth and dish soap, then use a degreaser only on greasy zones.
- Focus on areas around handles, the bottom edge of upper cabinets, and the space above the range, where airborne grease settles.
- Rinse with clean hot water and a fresh cloth, changing rinse water often.
- Dry completely before applying anything else; finish will not bond to a damp surface.
A common mistake is soaking the wood. Use a damp cloth, not a wet one, and dry as you go. For deeper buildup, a fine steel wool pad with a light cleaner lifts residue without stripping the finish, but test it on a hidden spot first.
Match the Cleaning Method to the Surface
The same steps do not apply to every cabinet. Adjust before you start:
- Solid wood and veneer: keep moisture low, rinse thoroughly, and dry immediately; veneer seams and edges show water damage first.
- Painted cabinets: use a pH-neutral cleaner and soft cloth; aggressive degreasers can soften paint, and scrubbing can burnish the sheen.
- Laminate and vinyl wrap: avoid oil-based cleaners and abrasives, which can cloud the print layer; a laminate-specific cleaner and soft cloth are enough.
Ventilate and Handle Products Safely
Many degreasers and restoration products give off fumes, and kitchen surfaces are close to food. The EPA guidance on indoor air quality is a useful reference for ventilation while using solvent-based products.
Watch out: never mix cleaners. Combining bleach-based and ammonia-based products, or an acid-based degreaser with bleach, can release dangerous fumes.
Once the surface is clean, dry, and spot tested, you are ready for the restoration step. Cleaning decides whether the rest of the job holds up.
How to Restore Dull Kitchen Cabinets Without Sanding
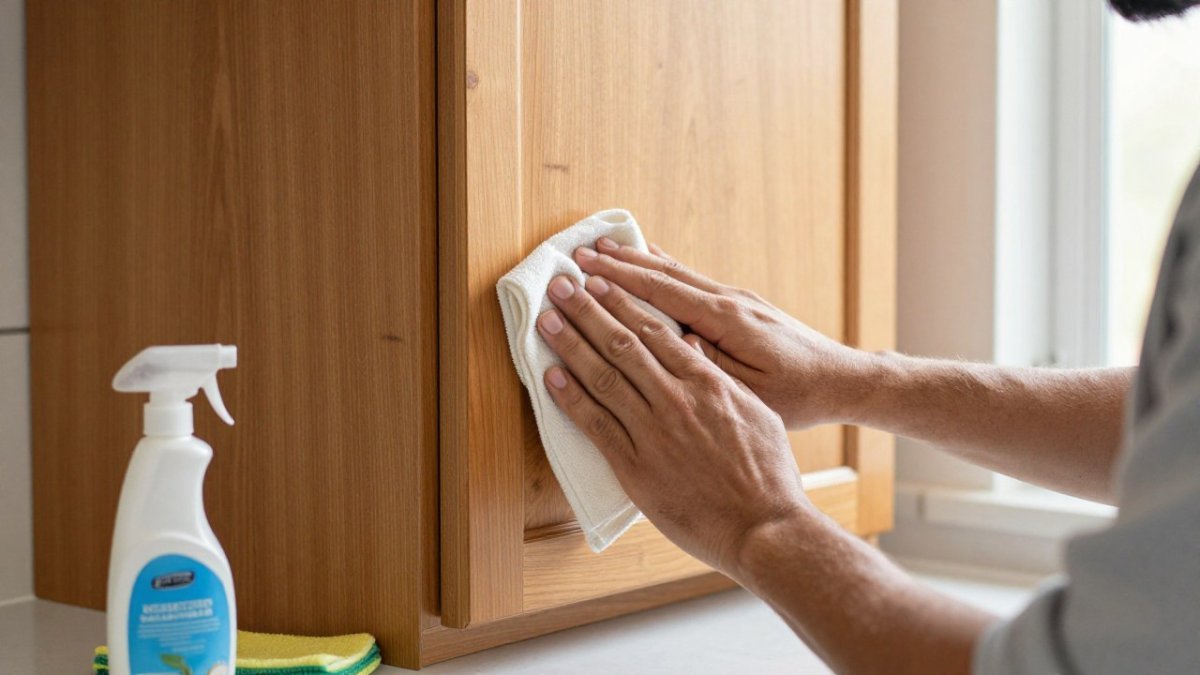
You can restore dull kitchen cabinets without sanding by cleaning the surface, spot testing, then applying a restorative finish and a thin coat of feed wax. This works on wood cabinets with an intact finish, not on bare wood or peeling coatings.
Spot Test Before You Apply Anything
A spot test is a small application of your chosen product on a hidden area to check color and compatibility. Do it every time, even if you have used the product before.
Test on the inside of a cabinet door or a hidden side panel. Apply a small amount, wait the full time the label states, then check for:
- Uneven color
- Sticky residue
- A finish that looks cloudy or milky
If any of those appear, stop and try a different product.
Apply a Restorative Finish and Wax Evenly
Apply the restorative finish in thin, even coats with a clean cloth, working with the wood grain. Let each coat dry fully before adding the next, one thin coat beats one heavy coat every time.
Watch out: too much wax traps dirt and turns gummy. Two thin coats are plenty.
Choosing the Best Product to Restore Kitchen Cabinets
Match the product to the finish:
- Clear coated wood: a restorative finish designed for sealed wood
- Older varnish or shellac: a gentle oil-based restorer, tested first
- Painted cabinets: a cleaner and polish made for painted surfaces
Check the label for food-safe handling if you are working near food prep areas. Open windows and run a fan during application, and let the room air out before you use the kitchen again. The EPA guidance on indoor air quality is a useful reference for ventilation while using solvent-based products.
Buy a small size first. Test it, then commit to the full job only if the result looks even.
How to Fix Worn Spots on Kitchen Cabinets and Troubleshoot Uneven Results
Fix worn spots by cleaning the area, spot testing, and building color back in thin layers rather than one heavy coat. Uneven results usually come from leftover grease, too much product, or a finish that was already failing.
Try these fixes:
- Uneven color: clean again with a degreaser, then apply a thinner coat.
- Sticky residue: you used too much product. Wipe off the excess and buff with a dry cloth.
- Persistent dullness: the finish may be worn through. Wax will not fix bare wood.
If a spot still looks wrong after two attempts, the finish is likely too far gone for a no-sand approach. That is the point to call a pro rather than keep adding product. The American Coatings Association publishes background on finish types and compatibility if you want to dig deeper.
For worn spots on cabinet doors, check the edges and corners first. Those wear fastest and often tell you whether the whole cabinet needs attention.
Book a Cabinet Restoration Estimate With Johnny Stone Work
Dull cabinets are usually a finish problem, not a replacement problem. Clean them, test your product, and restore the sheen in thin layers.
That is where we come in. We handle kitchen cabinet restoration that brings old doors and frames back to life, and you can request a free estimate before you commit to anything. Browse our project gallery to see past restorations. We also offer marble and stone care services in Manhattan and marble polishing and stone restoration in Brooklyn, so we can care for your counters and floors while we are there.
Get started with Johnny Stone Work and bring your cabinets back to a finish you are proud to show.
Dull cabinets rarely need replacing. They need the right clean, the right product, and a careful hand.
Frequently Asked Questions
How do you make dull cabinets shine again?
Start by degreasing the surface with a mild dish soap and hot water mix, since grease and grime block any finish from bonding. Once dry, apply a restorative finish or feed wax with a soft cloth, working in the direction of the wood grain. Buff off the excess and let it cure. For wood cabinets, a light pass with fine steel wool before waxing helps even out the surface sheen.
Can you restore kitchen cabinets without sanding?
Yes, in most cases. If the existing finish is intact and the dullness comes from grease, residue, or oxidation, you can restore dull cabinets without sanding by cleaning thoroughly and applying a restorative finish or wax. Sanding is only needed when the finish is cracked, peeling, or deeply scratched. Always spot test a small hidden area first to confirm the product works with your finish.
What is the best product to restore kitchen cabinets?
The right product depends on your finish. For wood cabinets with a clear finish, a restorative finish product or feed wax works well for reviving surface sheen. For painted cabinets, a non-abrasive cleaner followed by a quality polish is safer. Avoid products with harsh solvents on painted or laminate surfaces. Spot test on a cabinet door’s interior before applying anything across the full kitchen.
How do you fix worn spots on kitchen cabinets?
Clean the worn area with a degreasing solution and let it dry fully. For light wear, a restorative finish or a matching wood touch-up marker can blend the spot. For deeper wear where the finish has worn through, you may need a localized refinish or a professional assessment. Johnny Stone Work provides free estimates for kitchen cabinet restoration across the NYC area, including Brooklyn, Long Island, and Astoria.